
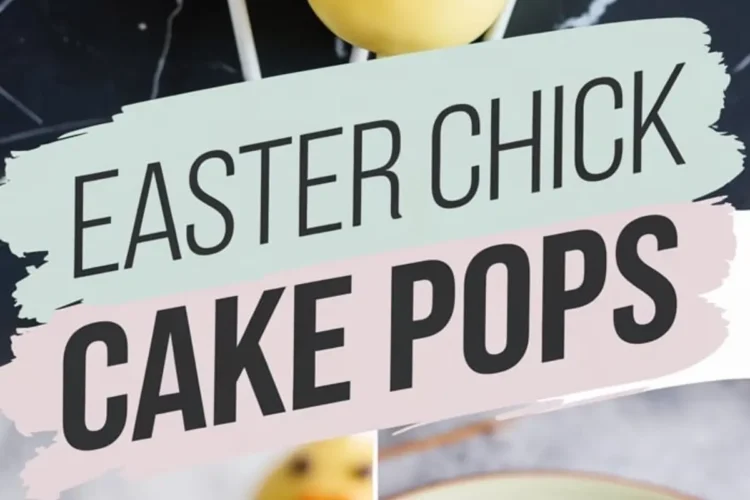
I once stood in my aunt’s watching her craft little treats out of leftovr cake pieces. My younger self was in awe of those cheerful confections that brightened the table. My memory of that scene inspired these Easter Chick Cake Pops, and I hope you enjoy a slice of nostalgia while preparing them.
My cat, Whiskers, sat at my feet last week, sniffing the air as I recreated these pops for family. He has a habit of sneaking tiny crumbs whenever they drop on the floor. He claimed his spot near the mixing bowl, eyeing my every move, and I realized that anticipation fuels the magic in our kitchens.
I almost gave up on these pops at first, but there is a small detail that transformed the entire process. That surprise ingredient had me scribbling notes in the margin of my Pin Notebook, determined to perfect the taste and texture. Curiosity might spark a question: what could possibly be missing from an already sweet treat? Let the story unfold.

Easter Chick Cake Pops: Key Ingredients
A baked vanilla or yellow cake forms the base for these Easter chick bites. Cream cheese frosting or buttercream works best for blending with the cake, creating a moist yet firm texture. Yellow candy melts supply that bright color, and there is flexibility in mixing with white melts to achieve a layered look.

Mini chocolate chips or black sugar pearls anchor the expressions on each chick’s face. An orange candy or fondant piece for the beak brings a pop of color. A tuft of yellow fondant or a dollop of melted candy completes the chick’s playful hairstyle.
A lollipop stick holds each pop, and a bit of vegetable oil can thin the melts if they feel too thick. White chocolate melts, used as a base layer, form an extra coat for those seeking added richness. The ingredients sound straightforward, but watch for that unexpected element later.
Easter Chick Cake Pops: Detailed Steps

Crumbling the cooled cake into fine crumbs sets the stage for a smooth, compact mixture. My approach involves rubbing it between clean palms until it feels like damp sand. I add the frosting little by little, mixing until it holds its shape without turning sticky.
Chilled cake balls stay in the fridge before I dip them in melted candy, which prevents them from falling apart. I start by dipping the tip of each stick into melted candy, then insert it into the cake ball. The pops return to the fridge or freezer until firm enough for a coating of bright yellow.

A second coat with white chocolate is optional, but it brings a double layer of color and taste. Smooth coverage is essential, so I tap off any extra candy before the final layer. My Golden Spoon, inherited from Aunt Marian, stirs the candy melts each time, reminding me of the tradition passed down through generations.
The Secret Element That Changed Everything
Some folks assume these pops contain every sweet touch possible, but I discovered a small dash of lemon zest that awakens the flavor. That addition gives a gentle zing beneath the sugary layers. I first tested this twist after noticing a slight flatness in the original recipe.
My Pin Notebook gained a new entry: “Add half a teaspoon of lemon zest to the cake mixture before shaping.” This step brightened the final result, leading friends and family to ask why it tasted so refreshing. Whiskers must have sensed something special too, because he sniffed the air even more carefully that day.
That burst of citrus doesn’t overshadow the vanilla essence. Instead, it complements the sweetness and creates a balanced finish. I first worried that lemon might clash with the chocolate details, but it simply added depth. Many classic desserts, like Chocolate Bread Pudding or Chocolate Mousse Cake, benefit from subtle acidic notes, so it felt natural to apply the same idea here.
Stay Inspired and Pin for Later
Sharing these cheerful cake pops helps keep traditions alive. Friends have told me how a child’s face lights up upon spotting these bright chicks on the dessert table. I always encourage experimenting with small variations, such as swapping fondant shapes or mixing different candy colors.

You can save this recipe on Pinterest for easy reference. A pinned reminder allows quick access during busy holiday seasons, and you might experiment with new flavors next time. My favorite part is reading the comments where everyone swaps ideas, questions, and success stories.
Would you consider making these Chick Cake Pops for your next gathering? Let me know how they turn out in your own kitchen. I would love to hear about your experience, whether you used the lemon zest addition or discovered a different twist altogether.
Pin this recipe now and feel free to share any new ideas with everyone. Comments or questions can inspire someone else who never thought to add a splash of lemon zest or an extra drizzle of melted candy. This kind of exchange keeps our kitchens buzzing.
Easter Chick Cake Pops Recipe

Soft vanilla cake is mixed with frosting, rolled into bite-sized balls, and coated in a smooth yellow candy shell. Each cake pop is decorated with chocolate chip eyes, an orange candy beak, and a tuft of yellow "hair" to resemble a cute Easter chick.
Ingredients
- FOR THE CAKE POPS:
- 1 baked vanilla or yellow cake, fully cooled
- ½ cup (120g) cream cheese frosting or buttercream
- 12 oz yellow candy melts (or a combination of white and yellow for a layered effect)
- ½ teaspoon vegetable oil (optional, to thin candy melts)
- Lollipop sticks
- FOR THE DECORATION:
- Mini chocolate chips or black sugar pearls (for the eyes)
- Orange candy-coated sunflower seeds or small fondant triangles (for the beak)
- Yellow fondant or extra melted candy for the chick's "hair"
- OPTIONAL:
- 6 oz white chocolate melts for an extra layer before the yellow coating
Instructions
- MAKE THE CAKE POP DOUGH: Crumble the cooled cake into fine crumbs using your hands or a food processor. Add the frosting gradually, mixing until the texture is moist enough to hold its shape but not sticky. Roll the mixture into 1-inch balls and place them on a parchment-lined baking sheet. Chill in the refrigerator for at least 1 hour or in the freezer for 20 minutes.
- INSERT THE STICKS: Melt a small amount of yellow candy melts (or white if using the double-layer method). Dip the tip of each lollipop stick into the melted candy, then insert it halfway into a chilled cake ball. This secures the stick in place. Chill for another 15 minutes.
- COAT THE CAKE POPS: If using the optional white chocolate layer, melt the white chocolate in a microwave-safe bowl in 20-second intervals, stirring between each interval. Dip each cake ball into the white chocolate, tapping off the excess. Allow it to set completely before applying the yellow coating.
- APPLY THE FINAL COATING: Melt the yellow candy melts using the same method. If needed, stir in a small amount of vegetable oil to achieve a smoother consistency. Dip each cake pop into the yellow coating, ensuring full coverage. Gently tap off the excess and allow them to dry upright in a foam block.
- DECORATE THE CHICK FACES: While the coating is still slightly wet, attach the decorations. Press two mini chocolate chips or sugar pearls onto each pop for the eyes and place an orange candy-coated sunflower seed or fondant triangle for the beak. If the coating hardens too quickly, use a dab of melted candy melts to secure the decorations.
- ADD THE CHICK’S HAIR: Roll tiny pieces of yellow fondant into small strands and press them onto the top of each cake pop. Alternatively, pipe small dollops of melted yellow candy melts on top and let them set.
- SET THE CAKE POPS: Let the decorated cake pops sit at room temperature until fully set before serving.
Notes
For best results, use a dense cake rather than a light, airy cake to help the cake pops hold their shape.
If the candy melts are too thick, add ½ teaspoon of vegetable oil at a time until the desired consistency is reached.
To help cake pops dry evenly, use a foam block to hold the sticks upright while the coating sets.
Store cake pops in an airtight container at room temperature for up to 3 days or in the refrigerator for up to a week.
Nutrition Information:
Yield:
20Serving Size:
1Amount Per Serving: Calories: 231Total Fat: 9gSaturated Fat: 4gTrans Fat: 0gUnsaturated Fat: 4gCholesterol: 8mgSodium: 180mgCarbohydrates: 38gFiber: 1gSugar: 29gProtein: 2g
