
Some Halloween desserts rely on candy eyeballs and plastic bones. This one tells the story with color, contrast, and a deep, crimson drip that looks straight out of a horror film.
You’ll learn how to build this bloody cheesecake step by step. It starts with a chocolate crust, rises into a smooth, tangy cheesecake, and finishes with a homemade berry sauce that doubles as edible blood.
This dessert blends the rich flavor of red velvet cheesecake with the sharp bite of berry cheesecake. It holds up well on a dessert table and slices cleanly, even after hours in the fridge. That’s reason enough to trust it.
But what sets this recipe apart isn’t just its looks. There’s a small, unexpected twist in the sauce that sharpens the flavor and adds clarity. I’ll tell you what it is later.
Let’s start from the base.

Oreo Crust That Holds and Bites Back
I’ve tried other crusts. Graham cracker. Chocolate wafer. Even pretzel once, though that one got soggy too fast. But nothing supports a cheesecake with berry sauce quite like crushed Oreo cookies.

They bring that deep cocoa flavor without becoming dry. The filling inside the cookie helps everything bind when you mix it with melted butter. It presses into the pan like damp sand and bakes into something solid, not crumbly.
Baking it for ten minutes before the filling gives it strength. That way, it won’t buckle under the weight of the creamy center or the thick berry sauce.
You could skip the oven, but if you want a clean slice, don’t.
And if you’re playing with spooky designs, this Spider Web Cheesecake gives you swirl techniques that work beautifully over a dark base like this.
Smooth Filling, Sharp Contrast

A Halloween cheesecake needs structure. It should slice easily but still feel soft on the tongue. That balance comes from using full-fat cream cheese and letting it soften fully.
Cold cream cheese leads to lumps. Lumps stay. No matter how hard you beat later.
Once the sugar dissolves, eggs go in one by one. Take your time here. Scrape the bowl often. I use a hand mixer on low speed to keep air out. We want smooth, not fluffy.
Then sour cream comes in. It adds tang and gives the filling that custard-like finish. Vanilla for warmth. Salt for balance. No food coloring. Let the berries do the work later.
If you prefer no-bake versions, you could skip the oven, but it won’t have the same clean structure as this one. That’s especially true if you’re pouring on heavier toppings like the one in my How to Make Edible Blood tutorial.
Why the Water Bath Matters
People skip the water bath to save time. I’ve done it too. Then regretted it every time I saw the surface crack or puff unevenly.
A water bath protects the batter from sharp heat. It cooks it low and steady. The difference in texture is real. No dry edges. No puffing. Just soft, even cheesecake with a slight wobble at the center.
Wrap the springform tightly. Use hot water in the roasting pan. Don’t fill past halfway. It’s not hard, just an extra few minutes of care that changes the outcome.
If you want something more playful and less technical, the Witch Cauldron Cheesecake might suit your mood. But this one? It’s serious dessert work, and it shows.
Bloody Berry Sauce: More Than Decoration

Now here’s where things shift from classic to creepy.
This isn’t a cherry glaze. There’s no food dye involved. The color comes naturally from frozen raspberries and blackberries cooked down with sugar. They give the sauce acidity, depth, and that blood-red hue that looks almost too real.
After simmering, I strain out the seeds. Then I put it back on the stove for a second simmer. That second cook makes it thick enough to cling without sliding off too fast.
A cherry topping looks too artificial to me. Too glossy, too red. In my experience, the raspberry-blackberry combo reads better visually and balances the richness of the cheesecake more effectively.
Want to use the sauce for cupcakes, cookies, or even ice cream?
Every detail in this How to Make Edible Blood from Emma’s Cake Studio. You’ll find tips on how to control consistency, deepen the color, and even add texture for different effects.
Comparison: Fresh vs Frozen Berries
I’ve made this sauce with fresh berries before, thinking it would somehow improve the flavor. It didn’t.
Frozen berries break down faster and more evenly in heat. They release more juice, which is exactly what you want when building a sauce. Fresh berries sometimes need extra water, which dulls the flavor.
Unless you’re in peak berry season, frozen berries win for both taste and texture here.
That brings me to the quiet hero of this dessert.
The Dash That Changes Everything
It’s the lemon juice. Just a tablespoon, but it brightens the berries and keeps the flavor sharp even after chilling.
Without it, the sauce can turn flat. Add it after the first simmer, before straining. You won’t taste lemon directly. It’s just there to wake everything up.
It’s one of those small things that makes a big difference. Like salt in chocolate, or vinegar in pie dough.
Serve Cold, Slice Clean
Once the cheesecake cools, I let it sit overnight in the fridge. It slices cleaner that way. When ready to serve, I pour the cooled berry sauce on top. Some people spoon it delicately. I like the drama of a full pour and natural drips.
That’s the beauty of this dessert. It looks theatrical but doesn’t ask for theater-level effort.
If you’re building a Halloween spread, add this Halloween Cheesecake to your board. It gives your guests options and fills the table with color and texture.
Pin This Cheesecake for Halloween and Share Your Twist

This Bloody Cheesecake belongs on your Halloween dessert table. It tastes like a classic but looks like something from a Tim Burton film. That contrast makes it unforgettable.
If you’re building a spooky board this year, save this recipe now so you can find it later. And when you make it, come back and let me know how it turned out. Did you add your own flair? Maybe a plastic knife? I’d love to hear.
Community makes this fun. Leave a comment or question below.
Bloody Cheesecake
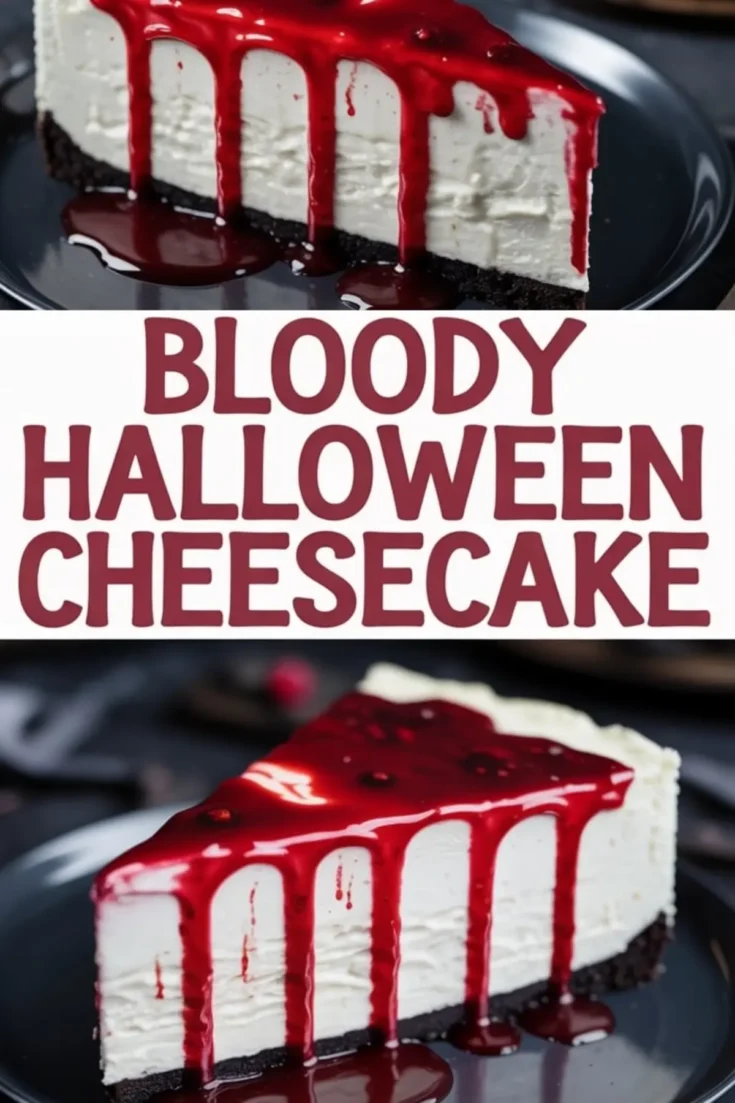
This bloody Halloween cheesecake is the ultimate spooky dessert for your Halloween party. Featuring a rich and creamy cheesecake filling, dark chocolate crust, and a dramatic edible blood topping made from berry sauce, it’s perfect for Halloween food desserts, haunted house tables, or gothic-themed events. This Halloween cheesecake combines eerie presentation with decadent flavor for a dessert that’s as creepy as it is delicious. Ideal for fans of red velvet cheesecake or berry cheesecake with a dark twist. Add this Halloween cheesecake idea to your baking list for a unique, horror-inspired treat that will stand out at any Halloween gathering. No-bake and baked versions can both work, depending on the vibe you’re going for. Use edible blood drips or pools for extra gore. For Halloween food boards, Halloween dessert tables, or horror-themed birthdays.
Ingredients
- FOR THE CRUST
- 24 whole Oreo cookies (with filling)
- 5 tablespoons unsalted butter, melted
- FOR THE CHEESECAKE
- 24 ounces (3 blocks) cream cheese, softened
- 3/4 cup granulated sugar
- 3 large eggs, room temperature
- 1/2 cup sour cream
- 1 teaspoon vanilla extract
- 1/4 teaspoon salt
- FOR THE BLOOD SAUCE
- 1 1/2 cups frozen raspberries
- 1/2 cup frozen blackberries
- 1/2 cup granulated sugar
- 1 tablespoon lemon juice
- 2 tablespoons water
Instructions
- PREPARE THE CRUST: Preheat the oven to 350°F (175°C). Crush the Oreo cookies into fine crumbs using a food processor. Mix the crumbs with melted butter until evenly combined and the texture resembles damp sand. Press the mixture firmly into the bottom of a 9-inch springform pan. Bake for 10 minutes, then set aside to cool completely.
- LOWER THE OVEN TEMPERATURE: Reduce oven temperature to 325°F (160°C) to prepare for baking the cheesecake.
- MAKE THE CHEESECAKE FILLING: In a large bowl, beat the softened cream cheese until smooth and free of lumps. Add the sugar and mix until fully incorporated. Add the eggs one at a time, mixing on low speed and scraping down the sides of the bowl as needed to ensure a smooth batter. Stir in the sour cream, vanilla extract, and salt until combined.
- ASSEMBLE THE CHEESECAKE: Pour the cheesecake batter over the cooled crust and smooth the top with a spatula.
- SET UP THE WATER BATH: Wrap the outside of the springform pan tightly with aluminum foil to prevent water from seeping in. Place the wrapped pan inside a larger roasting pan and fill the outer pan with hot water until it reaches halfway up the sides of the springform pan.
- BAKE THE CHEESECAKE: Bake at 325°F (160°C) for 60 minutes. The center should still have a slight jiggle when gently shaken. Turn off the oven, crack the door open slightly, and let the cheesecake rest inside for 1 hour.
- CHILL THE CHEESECAKE: Remove the cheesecake from the oven and water bath. Allow it to cool to room temperature, then refrigerate for at least 4 hours or overnight to fully set.
- MAKE THE BLOOD SAUCE: In a medium saucepan, combine the frozen raspberries, blackberries, sugar, lemon juice, and water. Bring to a simmer over medium heat and cook for 15 minutes, stirring occasionally, until the berries break down completely.
- STRAIN THE SAUCE: Pour the mixture through a fine mesh sieve set over a bowl to remove seeds, pressing the fruit to extract as much liquid as possible. Discard the solids.
- THICKEN THE SAUCE: Return the strained liquid to the saucepan and simmer for an additional 5 minutes until it thickens slightly. The sauce should coat the back of a spoon. Let it cool completely before using.
- SERVE THE CHEESECAKE: Just before serving, pour the cooled berry sauce over the cheesecake, allowing it to drip naturally down the sides for a dramatic effect. Slice and serve chilled.
Notes
To prevent cracks, avoid overmixing the batter and ensure the water bath remains at a consistent level during baking. The sauce can be made up to 3 days in advance and stored in the refrigerator.
Nutrition Information:
Yield:
12Serving Size:
1Amount Per Serving: Calories: 542Total Fat: 35gSaturated Fat: 18gTrans Fat: 0gUnsaturated Fat: 13gCholesterol: 130mgSodium: 442mgCarbohydrates: 49gFiber: 3gSugar: 37gProtein: 12g
