

Peanut butter thumbprint cookies with caramel centers are more than a sweet treat—they’re little pockets of joy, simple in their making yet extraordinary in their impact. I first fell for these cookies on a quiet weekend when I needed a little indulgence to brighten the day.
There’s something soothing about the process: creaming butter, rolling soft dough between your palms, and finally filling each tender cookie with a pool of caramel that glistens like molten gold. These cookies are a celebration of balance—the rich nuttiness of peanut butter mingling with the buttery sweetness of caramel. The added sprinkle of flaky sea salt is the kind of flourish that takes them from delightful to unforgettable.

Making these cookies is like a meditation in sweetness, and I’m excited to guide you through creating your own.
The Key Ingredients for Success
These cookies rely on simple ingredients you likely already have. Peanut butter brings richness, while caramel candies (like Kraft or Werther’s) transform into a silky filling that elevates these humble thumbprints into a dessert worthy of sharing. Softened unsalted butter ensures the dough is perfectly creamy, while brown sugar adds a subtle molasses flavor that deepens the sweetness. A pinch of salt in the dough keeps the sweetness from overwhelming, and a whisper of vanilla ties everything together.

For the caramel filling, heavy cream is the secret to keeping the melted candy smooth and glossy. And don’t forget the optional flaky sea salt—a small touch that enhances every bite.
Crafting the Dough
To make the cookie dough, start by creaming the softened butter, peanut butter, and sugars until they’re light and fluffy. This step is essential for achieving that tender, chewy texture we all love. Add a room-temperature egg and vanilla extract to bring everything together. In a separate bowl, whisk your dry ingredients: flour, baking powder, baking soda, and salt. Slowly incorporate these into the wet ingredients, mixing just until a soft dough forms. Overmixing here would toughen the cookies, so keep a gentle hand.
Chill the dough for at least 30 minutes. This step isn’t just for convenience—it’s the secret to cookies that hold their shape and have that satisfying chew.
Shaping and Baking
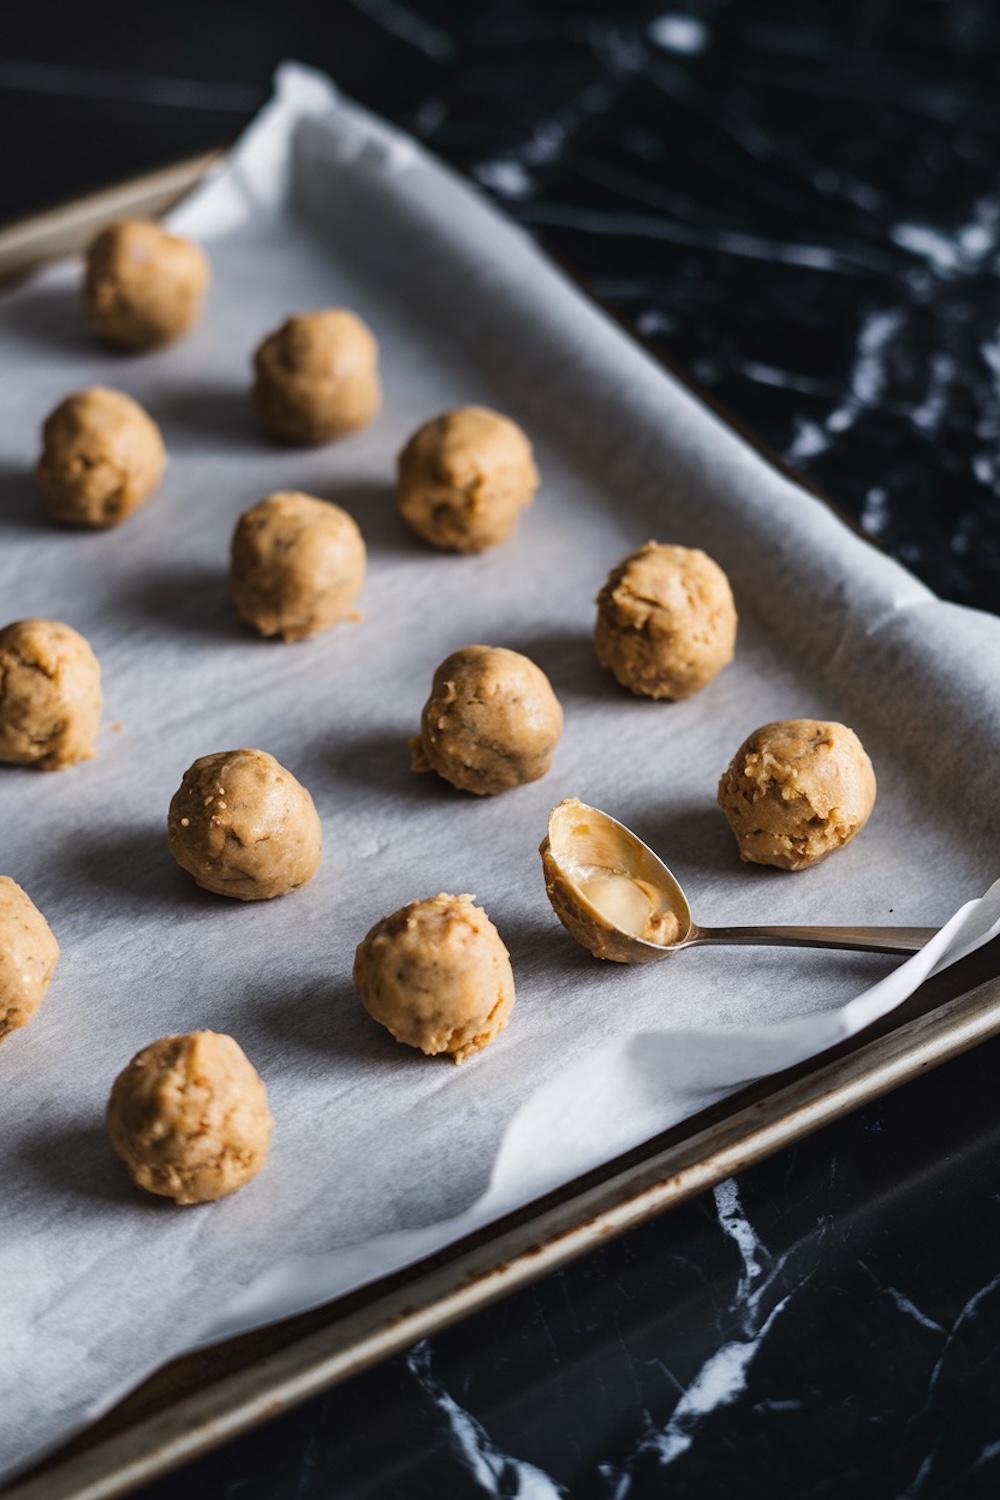
Once chilled, roll the dough into small, even balls about an inch wide. Space them out on a parchment-lined baking sheet to prevent them from merging as they bake. The thumbprint is where the magic happens: press gently in the center of each ball to create a small well. This will cradle the caramel later, so don’t skip this step! Bake until the cookies are lightly golden at the edges, then cool completely before filling them.
Preparing the Caramel
Melting caramel can feel tricky, but it’s easier than you think. Use a small saucepan and stir the caramel candies with heavy cream over low heat. Patience is key—high heat will scorch the caramel, but a gentle approach yields a glossy, pourable filling. As the caramel melts, the kitchen fills with its buttery aroma, a reward in itself.
How Long Will They Keep?
These cookies stay fresh for about 3–4 days when stored in an airtight container at room temperature. To extend their shelf life, refrigerate them for up to a week. The caramel will firm up slightly in the fridge but returns to its gooey glory after a brief sit at room temperature. Avoid freezing the cookies with caramel already filled—they tend to lose their texture when thawed. However, you can freeze the unbaked cookie dough for up to three months and bake them fresh when the craving strikes.

Bonus Tips for Cookie Success
- Don’t Skip the Chill: Chilling the dough ensures the cookies don’t spread too much in the oven.
- Customize the Filling: Swap the caramel with chocolate ganache or Nutella if you’re in the mood for something different.
- Use Good Caramel Candies: Quality matters here—cheaper candies may harden too much as they cool.
Serving Ideas for Extra Charm
These cookies are delightful on their own, but you can dress them up for special occasions. Arrange them on a platter with a few sprigs of rosemary or scatter them with crushed peanuts for a rustic look. Pair them with a cold glass of milk, a mug of hot cocoa, or even a drizzle of melted chocolate over the caramel for an indulgent touch.
Sweet Conclusions: Share the Love
Baking these peanut butter thumbprint cookies is an act of love. Every step, from rolling the dough to filling the caramel wells, feels purposeful and rewarding. They’re perfect for gifting, a crowd-pleaser at potlucks, or simply a way to brighten a rainy afternoon. I hope these cookies bring you as much joy as they’ve brought me.
Let me know how yours turn out! I’d love to hear if you add your own twist or find a creative way to share them. Snap a picture and tag me—I can’t wait to see your creations.
Peanut Butter Thumbprint Cookies with Caramel Recipe

These Peanut Butter Thumbprint Cookies with Caramel combine a tender peanut butter base with a smooth caramel filling. Perfectly balanced with a pinch of salt, they are easy to prepare with pantry staples.
Ingredients
- FOR THE COOKIES:
- 1/2 cup (1 stick) unsalted butter, softened
- 1/2 cup creamy peanut butter
- 1/2 cup granulated sugar
- 1/2 cup packed light brown sugar
- 1 large egg
- 1 teaspoon vanilla extract
- 1 1/4 cups all-purpose flour
- 1/2 teaspoon baking powder
- 1/2 teaspoon baking soda
- 1/4 teaspoon salt
- FOR THE CARAMEL FILLING:
- 15 caramel candies (such as Kraft or Werther’s)
- 2 tablespoons heavy cream
Instructions
- CREAM THE BUTTER AND SUGARS: In a large bowl, beat together the softened butter, peanut butter, granulated sugar, and brown sugar until fluffy and smooth, about 2–3 minutes.
- INCORPORATE THE WET INGREDIENTS: Add the egg and vanilla extract, beating until fully combined.
- COMBINE THE DRY INGREDIENTS: In a separate bowl, whisk together the flour, baking powder, baking soda, and salt. Gradually mix the dry ingredients into the wet ingredients to form a soft dough.
- CHILL THE DOUGH: Cover the dough and refrigerate for at least 30 minutes to ensure the cookies hold their shape.
- SHAPE THE COOKIES: Preheat your oven to 350°F (175°C). Line two baking sheets with parchment paper. Roll the chilled dough into 1-inch balls and place them 2 inches apart on the prepared sheets.
- MAKE THE THUMBPRINTS: Press your thumb or the back of a teaspoon gently into the center of each cookie to create a well, ensuring not to press through the dough.
- BAKE: Bake the cookies for 10–12 minutes, or until the edges are set and lightly golden. If the centers puff up during baking, gently press them down again after removing them from the oven. Cool the cookies completely on a wire rack.
- MELT THE CARAMEL: In a small saucepan over low heat, combine the caramel candies and heavy cream. Stir frequently until the mixture is smooth and pourable.
- FILL THE COOKIES: Use a small spoon to carefully fill each cookie’s well with the melted caramel. Allow the caramel to set for about 15 minutes.
- OPTIONAL GARNISH: Sprinkle a pinch of flaky sea salt over the caramel for added flavor and balance.
Notes
Store cookies in an airtight container at room temperature for up to 4 days.
For easier cleanup, grease your spoon slightly before filling cookies with caramel.
Nutrition Information:
Yield:
24Serving Size:
1Amount Per Serving: Calories: 156Total Fat: 4gSaturated Fat: 1gTrans Fat: 0gUnsaturated Fat: 2gCholesterol: 10mgSodium: 184mgCarbohydrates: 30gFiber: 0gSugar: 24gProtein: 2g
